How to Make Stage 3 Baby Food? Quick & Wholesome Recipes
To make Stage 3 baby food, steam, and mash or finely chop a variety of fruits, vegetables, and protein sources. Ensure the consistency is slightly chunky to encourage chewing.
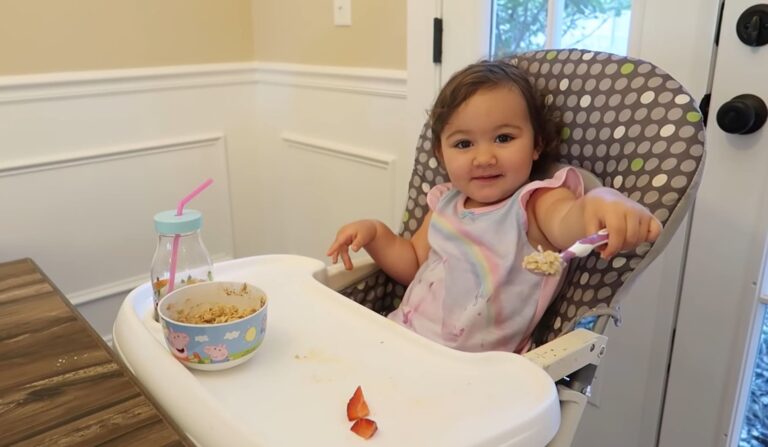
Welcome to the exciting world of Stage 3 baby food! This is a special time for little ones because they are ready to try foods that are a bit more like what the rest of the family eats. Stage 3 baby food is cool because it has small chunks and bits in it. These tiny pieces are perfect for babies who are learning to chew. Unlike the super smooth purees they ate as younger babies, Stage 3 foods help them practice chewing and using their growing teeth, even if they don’t have a lot of them yet.
But why are these chunky foods so important? As babies grow bigger, they need to learn how to eat different kinds of foods. Stage 3 foods are great for teaching them about new textures and tastes. It’s like a food adventure, where they discover how to handle bits of veggies, fruits, and even meats. This helps them get ready for the day when they’ll eat the same foods as mom and dad. Making Stage 3 baby food is not just about feeding your baby; it’s a big step in helping them grow up to be strong and healthy eaters!
Understanding Stage 3 Baby Food

Entering the world of Stage 3 baby food marks a pivotal moment in your little one’s culinary journey. This transition introduces them to new textures and complex flavors, setting the stage for a lifelong relationship with wholesome foods. Let’s explore what makes Stage 3 baby food unique, appropriate age considerations, and how it varies from earlier stages.
Age Range Typically Associated With Stage 3 Feeding
Babies typically progress to Stage 3 feeding when they are around 9 to 12 months old. During this age, infants start to:
- Develop finer motor skills, allowing them to pick up small pieces of food.
- Show readiness to chew, even if they don’t have many teeth yet.
- Express interest in self-feeding and trying to use utensils.
How It Differs From Stage 1 And Stage 2 Baby Foods
Each stage of baby food is tailored to the developmental stages of infants. The evolution from one stage to the next reflects their growing abilities:
| Stage | Description | Age Range | Texture |
| Stage 1 | Introductory single-ingredient purees | 4 to 6 months | Thin and smooth |
| Stage 2 | Slightly thicker purees with multiple ingredients | 6 to 9 months | Smooth with some consistency |
| Stage 3 | Combined ingredients with soft chunks for chewing | 9 to 12 months | Chunky and thicker |
Benefits Of Stage 3 Baby Food
Stage 3 baby food plays a vital role in infant development. The benefits include:
- Enhancing Motor Skills: The thick textures require more jaw work, strengthening muscles, and coordination.
- Preparing for Solids: Introducing chunks prepares infants for whole foods, easing the eventual move to family meals.
- Variety Boosts Nutrition: A broader range of ingredients ensures a balanced intake of vitamins and minerals.
- Developing Palate: Exposure to different tastes can promote a willingness to try new foods later in life.
Choosing Ingredients For Stage 3 Baby Food

Embarking on the journey of homemade Stage 3 baby food is an exciting transition for both parents and babies. As infants develop, their dietary needs evolve, requiring a thoughtful selection of ingredients to ensure balanced nutrition and a proper introduction to a world of new tastes and textures. Emphasizing whole, nutrient-rich foods while accounting for safety and the baby’s developing palate and chewing abilities is paramount.
Making the switch to Stage 3 baby food marks an important milestone in your little one’s eating habits. It’s the phase where babies learn to manage larger chunks and a variety of textures, paving the way for a smooth transition to more solid foods. Selecting the right ingredients not only nourishes your baby but also sets the foundation for healthy eating patterns.
Safety Considerations
- Avoid choking hazards: Double-check ingredients to eliminate hard pieces that a baby might not yet be able to chew or swallow.
- Sanitation: Always use fresh, clean ingredients and utensils to prevent any contamination that could lead to foodborne illness.
- Allergen watches: Introduce potential allergens like eggs, dairy, and nuts one at a time, keeping an eye out for any reactions.
Nutritional Requirements
To support their rapid growth and development, infants require a rich mix of nutrients. Stage 3 baby foods should include:
| Food Group | Examples | Nutrients Provided |
| Fruits | Bananas, apples, pears | Vitamins, fiber |
| Vegetables | Carrots, peas, sweet potatoes | Vitamins, minerals, fiber |
| Proteins | Pureed meats, legumes, full-fat yogurt | Protein, fats, iron, zinc |
| Grains | Soft-cooked rice, pasta, oatmeal | Energy, B vitamins |
Introduction Of New Textures And Flavors

Embracing diversity is key at this stage. Look for opportunities to incorporate an array of spices, herbs, and varied textures to stimulate your baby’s senses. Mashing, mincing, and chopping can help your little one practice chewing and adjust to different consistencies. Here are suggestions to enhance the culinary adventure:
- Introduce one new ingredient at a time to pinpoint dislikes or allergies.
- Mix familiar favorites with novel tastes to encourage acceptance.
- Use mild herbs and spices like cinnamon or basil to expand the palate without overwhelming it.
Equipment And Supplies Needed
Preparing to craft nutritious, homemade Stage 3 baby food begins with assembling the right equipment and supplies. The transition to more textured meals doesn’t have to be daunting. Here’s a detailed guide to the essential tools required to whip up a delicious feast for your little one. Ensuring you have these items on hand streamlines the preparation process, allowing you to create a variety of healthy, chunkier purees that cater to your baby’s growing appetite and developmental needs.
Blender Or Food Processor
A blender or food processor is your best ally when it comes to creating smooth, well-blended baby food. Even for Stage 3, where texture is introduced, these appliances can help finely chop or puree ingredients to the perfect consistency.
Steamer Or Microwave
To preserve the nutrients in fruits and vegetables, steam them using a steamer or a microwave. Steaming is a gentle cooking method that helps retain the natural flavors and vitamins crucial for your baby’s development. If short on time or equipment, a microwave is a quick alternative, especially when using microwave-safe steaming bags.
Ice Cube Trays Or Storage Containers
For convenient serving sizes and storage, ice cube trays or small storage containers are ideal. By freezing purees in these trays, you can thaw them individually, reducing waste and allowing for a variety of meals throughout the week.
| Storage Option | Benefits |
| Ice Cube Trays | Perfect portion sizesFreeze and store easilySimple to pop out single servings |
| Storage Containers | Variety in sizesReusable and eco-friendlySuitable for fridge or freezer |
Baby Spoons And Bowls
Don’t forget about baby spoons and bowls. Soft-tipped spoons are gentle on your baby’s gums, and small bowls are the perfect size for those petite portions. Having a set dedicated to your baby’s meals minimizes cross-contamination and ensures that you’re always ready for feeding time.
- Soft-tipped Spoons: Gentle on gums, ideal for baby-led feeding.
- Small Bowls: Non-toxic materials and the right size for baby portions.
Preparing Stage 3 Baby Food

Stage 3 baby food marks a significant milestone in your baby’s culinary journey, opening the doors to a diverse world of flavors, textures, and nutrition. It introduces chunkier textures that help babies in developing their chewing and swallowing skills. Ensuring a safe, nutritious, and delightful experience for your little one requires careful preparation. Let’s walk through the steps to make homemade Stage 3 baby food that’s both savory and safe for your bundle of joy.
Washing And Peeling Fruits And Vegetables
It all starts with properly handling and cleaning the ingredients. Fresh produce can harbor bacteria and pesticides that are not suitable for your baby’s delicate system. Here’s how to ensure they are thoroughly cleansed:
- Rinse fruits and vegetables under running water.
- Use a clean brush to scrub surfaces.
- Peel skins off where necessary, especially for non-organic produce.
Remember, the goal is to keep only the nutrients and flavors while eliminating potential contaminants.
Cooking And Pureeing Ingredients
The excitement builds as you turn fresh ingredients into baby-friendly meals. The cooking process is two-fold: it softens the food to the ideal consistency for pureeing and also ensures it’s gentle on your baby’s digestive system.
- Steam or boil the produce until tender.
- Retain some of the cooking liquid to preserve nutrients and assist in blending.
- Use a food processor or blender to puree ingredients to the desired consistency.
Stage 3 baby food shouldn’t be as smooth as earlier stages. Instead, aim for a thicker consistency with small, manageable chunks that encourage mashing and chewing.
Achieving the perfect texture may require a bit of trial and error, so don’t be afraid to adjust the amount of liquid or blending time to meet your baby’s needs.
Recipes For Stage 3 Baby Food

Welcome to the delightful world of Stage 3 Baby Food, where little ones are starting to explore a more diverse range of flavors and textures. This stage is crucial as it not only nourishes your baby but also helps in developing their chewing skills. Here are some delicious, nutrient-packed recipes guaranteed to tickle those tiny taste buds and aid in their growth journey.
Mixed Vegetable Puree With Protein
This recipe delivers a hearty boost of nutrition with a combination of vegetables and protein. To make:
- Steam a colorful medley of carrots, peas, and sweet potatoes until tender.
- Combine the vegetables in a blender with cooked lentils or beans for added protein.
- Puree until you reach a chunkier, yet manageable consistency for your baby to handle.
A dollop of olive oil can ensure the intake of healthy fats, essential for brain development.
Quinoa And Fruit Puree
A blend of protein-rich quinoa and sweet fruits can create an energizing meal. Follow these steps:
- Cook quinoa according to package instructions, making sure it’s soft and fluffy.
- Mash ripe banana or cooked pear with the quinoa.
- For variety, add pitted and pureed cherries or apples into the mix.
The result is a creamy, nutritious dish with a balance of natural sweetness and whole grains.
Chicken And Vegetable Congee
This comforting dish is perfect for babies ready to handle more texture. To whip up a batch:
| Ingredient | Amount |
| Chicken breast | 1 small piece |
| Rice | 1/4 cup |
| Assorted Vegetables (carrots, zucchini) | 1/2 cup |
| Water | 2 cups |
- Cook the ingredients on low heat until the congee reaches a thick, porridge-like consistency.
- Let it cool and shred the chicken into fine pieces suitable for your baby’s eating abilities.
It’s not just a meal; it’s a hearty hug in a bowl.
Berry Yogurt Mash
For a delicious dose of probiotics and antioxidants, try:
- Take full-fat plain yogurt as the base for this recipe.
- Mash in blueberries, raspberries, or strawberries for a berry blast.
- If the berries are too tart, a little ripe banana can add natural sweetness.
A swirl of this creamy concoction offers a parade of flavors and excellent nourishment.
Each of these recipes is designed to be simple yet diverse, helping your baby graduate to more complex foods while keeping mealtime fun and healthy. Always remember to introduce new ingredients one at a time to monitor for allergies, and consult with your pediatrician for personalized dietary advice.
Storage And Safety
Welcome to the Storage and Safety segment of our guide on how to make Stage 3 baby food. As a parent or caregiver, you’ve masterfully navigated the earlier stages of purees and mash, and now it’s time to ensure those nutritious, chunkier meals remain safe and fresh for your little one. Proper storage and adhering to safety guidelines are pivotal to preserving the food’s quality and protecting your baby’s health.
Safe Storage Practices For Homemade Baby Food
Adopting safe storage practices is crucial when dealing with homemade baby food. Let’s dive into the essentials:
- Cool rapidly: To minimize bacterial growth, quickly cool down cooked baby food. It should not be left at room temperature for more than two hours.
- Airtight containers: Use sterilized air-tight containers to store the food. Options include freezer-safe glass jars or BPA-free plastic containers.
- Labeling is key: Mark each container with the content type and the date of preparation to keep track of freshness and prevent spoilage.
- Portion control: Store food in small portions to avoid wastage. Small batches can be thawed easily and ensure food is eaten in one sitting.
Shelf Life And Reheating Guidelines
Understanding how long homemade baby food lasts and how to properly reheat it is crucial:
| Type of Storage | Shelf Life |
| Refrigerator (40°F or colder) | 1-2 days |
| Freezer (0°F or colder) | 3-6 months for optimal quality |
For reheating, ensure the food reaches 165°F to kill any potential bacteria. Thaw frozen baby food in the refrigerator or by using the defrost setting on a microwave, and never refreeze previously thawed meals.
Continued Focus On Hygiene And Food Safety
The importance of maintaining stringent hygiene and food safety practices cannot be overstated:
- Always wash your hands thoroughly with soap before preparing food.
- Frequently sanitize all utensils, cutting boards, and surfaces used in food preparation.
- Use separate cutting boards for fruits/vegetables and meats to prevent cross-contamination.
- Immediately discard any baby food that has been contaminated by a used spoon or saliva to prevent the spread of bacteria.
By adhering to these guidelines, you can ensure your homemade Stage 3 baby food is not only nutritious and delicious but also safe and wholesome for your baby’s consumption.
Tips For Feeding Stage 3 Baby Food

Navigating the transition to Stage 3 baby food marks an exciting time for parents as well as their little ones. As infants become more experienced eaters, this phase introduces them to more complex textures and flavors. Finding the right way to integrate these new experiences can be crucial for your baby’s continued interest in food and its overall development. Here are some essential tips to make the shift to stage 3 foods a smooth and enjoyable journey.
Introduce One Ingredient At A Time
Stage 3 baby food often combines multiple ingredients, which can complicate identifying any potential food sensitivities or allergic reactions. Stick to introducing single ingredients initially, even if they are part of a blend. Maintain this approach for a couple of days before adding another new component. This strategy will help in pinpointing any adverse reactions.
Monitor For Allergies Or Digestive Issues
With new foods on your baby’s plate, vigilance becomes key. Keep an eye out for signs of allergies, such as rashes, hives, or respiratory problems. Likewise, digestive issues might arise, indicated by changes in bowel movements or discomfort. Documenting these experiences can be invaluable for discussions with your pediatrician. Investing in a food diary or using a smartphone app designed for this purpose can make tracking easier and more effective.
Gradually Increase Texture And Variety
Stage 3 is all about getting your baby accustomed to chunkier textures and more diverse flavors. Begin with foods that have a slightly increased texture and then work your way up to more complex varieties. Introduce soft, malleable pieces that they can mash with their gums. Ensure that all food items are easily swallowable to prevent choking hazards. This gradual progression encourages chewing and supports healthy dental and motor development.
Make Mealtime Fun And Interactive
- Engagement: Interact with your baby during mealtime with smiles, positive reinforcement, and a variety of foods to keep their interest piqued.
- Utensils: Introduce baby-friendly utensils to encourage self-feeding and independence.
- Mimicry: Babies often learn by imitating others, so eat alongside them to demonstrate how to use utensils and chew.
Creating a positive mealtime atmosphere fosters a healthy relationship with food and can turn every meal into a delightful discovery session for your baby.
Navigating Challenges
Transitioning your little one to Stage 3 baby food is an exciting milestone filled with new flavors, textures, and adventures. However, this journey isn’t always a smooth ride. As your baby becomes more assertive with their likes and dislikes, navigating the challenges of feeding can often feel like a culinary obstacle course. Tackling picky eaters, food rejections, and mealtime commotions are just part of the process. In this section, you will find advice and strategies for creating a positive and nutritious eating experience for your baby.
Dealing With Picky Eaters At This Stage
It’s not uncommon for babies to become selective about what they eat. At Stage 3, your baby is asserting independence, which can often include a newly discovered sense of culinary preference. Here’s what you can do:
- Offer a variety: Introduce a range of foods to expose your baby to different tastes and textures.
- Be patient: Sometimes, it may take multiple exposures to a new food before the baby accepts it. Persistence is key.
- Lead by example: Babies are observant and will often emulate what they see. Eat the same foods as your baby to encourage them to try.
- Make mealtime fun: Use colorful dishes and cut food into interesting shapes to make eating more engaging.
Handling Food Rejection And How To Introduce New Foods
Food rejection can be disheartening, but it’s a normal part of your baby’s development. Employ gentle persistence and these strategies to help ease the process:
- Introduce new foods alongside familiar favorites to avoid overwhelming your baby.
- Use a no-pressure approach; if the baby resists, take a break and try again later.
- Texture changes can help; for example, if mashed carrots were rejected, try finely chopped carrots instead.
- Keep portions small to avoid waste and reduce the pressure on your baby to finish a big meal.
Solutions For Common Mealtime Challenges
Each mealtime with your baby is a new opportunity to nurture and build healthy eating habits. Here are solutions to help you along:
| Challenge | Solution |
| Distractions | Maintain a consistent routine and keep the focus on food during meals to create a conducive eating environment. |
| Food Throwing | Stay calm and teach your baby that food is for eating, not playing; reinforcement is essential. |
| Rushing Through Meals | Encourage slow eating; savoring each bite can enhance acceptance and digestion. |
| Fussiness | Understand that fussiness is often temporary. Keep the mood positive and avoid forcing foods if your baby is not interested. |
Frequently Asked Questions Of How To Make Stage 3 Baby Food?
What Is Stage 3 Baby Food?
Stage 3 baby food is a thicker mixture with soft, chewable chunks designed for babies around 9 to 12 months who are mastering chewing and swallowing.
How To Prepare Stage 3 Baby Food At Home?
Begin by cooking fruits, vegetables, or meats until tender. Mash or chop into small, bite-sized pieces to offer a variety of textures for your little one to explore.
What Foods Are Included In Stage 3 Meals?
Stage 3 meals typically include a blend of fruits, vegetables, grains, and proteins, all cut into small, manageable chunks suitable for babies ready to chew.
Can I Store Homemade Stage 3 Baby Food?
Yes, homemade Stage 3 baby food can be stored in airtight containers in the refrigerator for up to 48 hours or frozen for future use.
What Textures Are Appropriate For Stage 3 Baby Food?
Textures in Stage 3 baby food should be a combination of thicker purees and soft, chewable pieces to encourage chewing without being too difficult to manage.
Conclusion
Creating stage 3 baby food at home is simple and fulfilling. Utilize fresh, quality ingredients to ensure your baby enjoys nutritious, texture-rich meals. Experiment with different flavors and combinations. Remember, introducing your little one to wholesome foods early sets the foundation for healthy eating habits.
Happy cooking and happier parenting!