
How to Make Stage 2 Baby Food?
To make Stage 2 baby food, steam or bake fruits and vegetables, then blend to a thicker, chunkier texture. Choose ripe, fresh produce, and avoid adding salt or sugar.
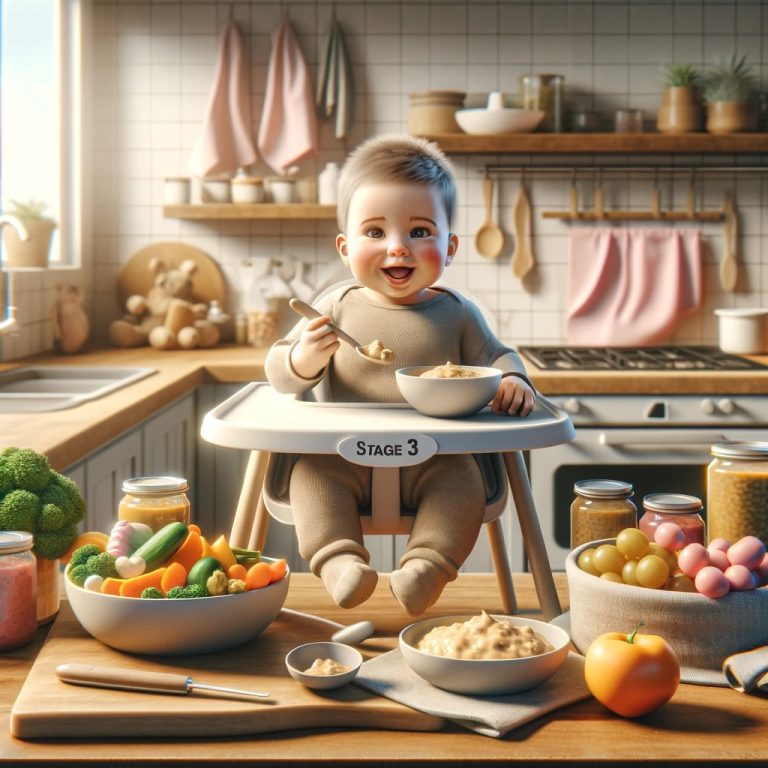
Welcome to the wonderful world of making Stage 2 baby food! When your little one is ready for more than just simple purees, that’s where Stage 2 baby food comes in. It’s like the next step in a baby’s eating adventure after they have tried their first foods. Stage 2 foods are a bit thicker than the very smooth and runny Stage 1 foods. They often mix different ingredients, like fruits and veggies, or even a bit of meat, all mashed up together. This is exciting because it lets babies try new tastes and learn to chew a bit, even if they don’t have many teeth yet!
But why are these foods so important? Well, as babies grow, they need different types of food to help them get strong and healthy. Stage 2 foods are perfect for this because they have more nutrients than babies need at this age. Plus, eating these kinds of foods helps babies learn how to move food around in their mouth and swallow bigger pieces, which is a big step in learning to eat like a grown-up. So, when you make Stage 2 baby food, you’re not just filling their tummies; you’re helping them grow and learn in all sorts of ways
Selecting Ingredients

Introducing your little one to solid foods is a milestone that comes with much excitement and a bit of anxiety. As a parent, you want to ensure that every spoonful of stage 2 baby food is not only delicious and easy to swallow but also packed with nutrition and free from harmful substances. The first step is selecting the right ingredients. The choices you make at this stage can help cultivate your baby’s taste buds and set the stage for healthy eating habits. Let’s dive into how to pick the best ingredients for creating wholesome and safe stage 2 baby foods.
Choosing Ripe Fruits And Vegetables
When it comes to making baby food, selecting the right fruits and vegetables is crucial. Ripe produce is at its peak of flavor and nutrition, which is exactly what your baby needs. Here’s how to identify ripe fruits and vegetables:
- Bananas: Look for bright yellow skins with tiny brown specks.
- Avocados: Choose ones that yield slightly to gentle pressure.
- Sweet Potatoes: Opt for firm ones with no soft spots or sprouts.
- Apples: Ensure they are firm with a vibrant color and a fresh aroma.
- Peas: Pick bright green pods that are plump and crisp.
With precise selection, you ensure your baby’s food is not only easier to puree but is also rich in flavor to help develop a love for fresh, wholesome foods.
Opting For Organic Produce
Choosing organic produce for your baby’s food can help minimize the exposure to pesticides and other chemicals often used in conventional farming. While it’s not always feasible for everyone, here’s why you might consider organic:
- Reduced Chemical Exposure: Organic foods are grown without synthetic pesticides or fertilizers.
- Environmental Impact: Organic farming practices often promote sustainability and biodiversity.
- Richer Nutrient Profiles: Some studies suggest organic produce may have higher nutritional value.
Providing organic ingredients can lead to a pure, wholesome introduction to solid foods for your baby.
Avoiding Allergenic Foods
While introducing a variety of foods to your baby is important, it’s essential to be aware of common allergens. Pediatricians often recommend introducing allergenic foods like eggs, dairy, and peanuts between 4 and 6 months of age. However, each child is different, and an individual approach is best. Here are a few tips to avoid allergenic reactions when starting with stage 2 foods:
| Common Allergens | How to Introduce | Signs of Reaction |
| Eggs | Introduce small amounts and watch for any reactions over a few days. | Rash, hives, or digestive distress |
| Dairy | Start with yogurt or cheese before moving on to cow’s milk. | Bloating, gas, or respiratory issues |
| Nuts and Peanuts | Use thinned nut butter or finely ground nuts in purees. | Face swelling, difficulty breathing, or vomiting |
Always consult your pediatrician before introducing new foods, particularly if you have a family history of food allergies. Ensuring a safe eating experience is just as crucial as the nutritional content of the food you provide.
Making stage 2 baby food at home gives you control over the ingredients, ensuring your baby gets the best start in life. By selecting ripe fruits and vegetables, opting for organic produce, and being mindful of allergenic foods, you create a foundation for lifelong healthy eating habits.
Preparation Techniques

Making Stage 2 baby food at home can be a healthful way to know exactly what your little one is eating. As your baby grows, the transition to thicker, chunkier textures is an important step. The goal is to encourage chewing while still ensuring the food is easy to swallow. Master these simple preparation techniques to create delicious and nutritious meals for your baby.
Washing And Peeling Fruits And Vegetables
Clean, peel, and prepare your chosen produce with the following steps:
- Rinse all fruits and vegetables under cold running water to remove any dirt or impurities.
- Use a vegetable brush for root vegetables to scrub off any lingering soil.
- Peel skins to avoid any hard-to-digest fibers. This is particularly important for younger infants who may not be ready for the extra texture.
Steaming, Baking Or Boiling
Once your fruits and vegetables are prepared, cook them to soften using one of these methods:
- Steaming: Use a steamer basket over boiling water. This method preserves most nutrients.
- Baking: Roast in the oven to bring out natural sweetness, ideal for root vegetables and fruits.
- Boiling: Simmer in water until tender; however, some nutrients may be lost in the water.
Always ensure the produce is tender enough to mash easily with a fork. This indicates that it’s ready for the next step.
Mashing, Pureeing, Or Blending
Transform your cooked ingredients into a smooth, appropriate texture for Stage 2 feedings:
| Technique | Tool | Description |
| Mashing | Fork or Potato Masher | Manually mash foods for a thicker, but still soft, consistency. |
| Pureeing | Blender or Food Processor | Create a smoother, finer texture, perfect for babies ready to move beyond smooth purees. |
| Blending | Immersion Blender | Quickly puree foods right in the cooking pot for minimal cleanup. |
For an even consistency, add water, breast milk, or formula to achieve the perfect thickness. Remember to always cool the food thoroughly before serving it to your baby.
Recipes For Stage 2 Baby Food

Transitioning your little one to solids is an exciting milestone! Stage 2 baby food is all about exploring a wider variety of flavors and textures. These recipes are designed to tickle tiny taste buds and provide essential nutrients. From smooth fruit and vegetable purees to delightful combination purees, get ready to prepare some delicious and nutritious options for your baby!
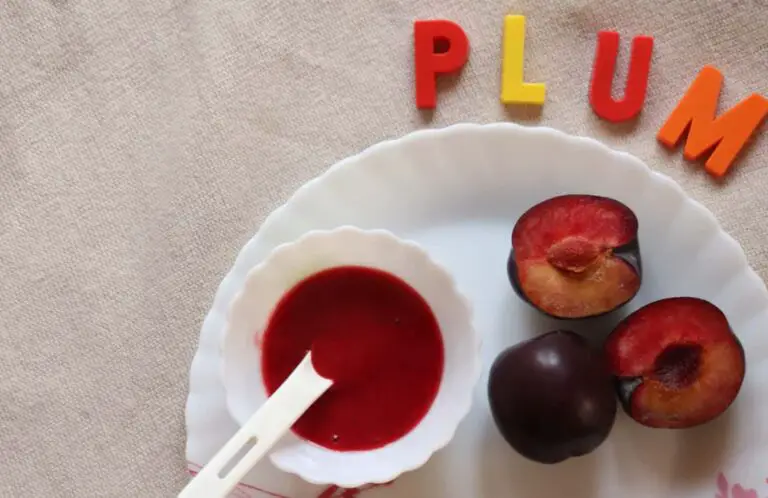
Fruit-based Purees
Introducing a colorful array of fruits is a great way to expand your baby’s palate. Fruit-based purees are naturally sweet and packed with vitamins.
- Apple & Pear Puree – Peel, core, and chop apples and pears. Steam until soft, and blend to a smooth consistency.
- Banana & Mango Puree – Combine ripe bananas and mango chunks. Blend until creamy with a splash of water or breastmilk if needed.
- Berry Medley – Use a gentle simmer to soften a mix of blueberries, raspberries, and strawberries, then puree. Strain to remove seeds for a silkier texture.
Vegetable-based Purees
Veggies are crucial for a balanced diet, offering a host of nutrients vital for growth and development. Vegetable-based purees should be smooth and easy to digest.
| Vegetable | Preparation |
| Sweet Potato | Bake or steam sweet potatoes until tender, then puree, adding water to reach desired consistency. |
| Carrot & Pea | Steam carrots and peas until soft. Puree together, adding a little cooking liquid or water. |
| Butternut Squash | Halve a butternut squash, remove seeds, bake until fork-tender, and blend to a puree. |
Combination Purees
Creativity shines in combination purees, where fruits and vegetables come together in one delicious spoonful. These mixes offer a powerhouse of nutrition and flavor.
- Peach, Apple and carrot – Steam and puree these ingredients together for a bright, nutrient-rich meal.
- Spinach, Blueberry & Banana – A beautiful blend of greens and fruits makes a vitamin-packed puree that looks as good as it tastes.
- Pumpkin, Apple and cinnamon – Perfect for autumn babies, this combo is gently spiced and wonderfully smooth.
Introducing New Flavors And Textures

As your bundle of joy grows, so should their culinary experiences. Stepping up from Stage 1 purees, Stage 2 baby food introduces a world of new flavors and more complex textures. This transition opens up an exciting phase as your little one gets to explore various tastes and learns how to manage different food consistencies. Embracing this milestone involves a careful strategy. Let’s dive into ways parents can wisely integrate diversity into their baby’s diet!
Gradual Introduction Of New Ingredients
Slow and steady wins the race, especially when introducing new ingredients to your baby’s palate. Start with single-ingredient purees that are only slightly thicker than Stage 1 foods. Once your child shows a favorable response to new foods individually, consider combining them to enhance their flavor profile.
- Begin with mild vegetables such as sweet potatoes or carrots.
- Progress to fruits like bananas or pears.
- Introduce protein-rich options such as pureed chicken or tofu.
Keep a close eye on allergic reactions with each new introduction, and always adhere to the four-day wait rule—allow four days before adding another new ingredient.
Transitioning To Chunkier Textures
As babies become accustomed to simple purees, thicker and chunkier textures should gradually make their way into meals. This stage is pivotal for developing chewing skills and preventing pickiness later on.
- Mash foods instead of puree to a smooth consistency.
- Introduce soft lumps that your baby can gum and mash.
- Add grains like cooked rice or oatmeal to vegetable purees for a varied texture.
Always supervise your little one during meals to ensure they are safely handling the new textures.
Incorporating Herbs And Spices
Bland is not always best for babies! Begin seasoning baby food with mild herbs and spices to develop an appreciation for a wide range of flavors. Take the plunge with:
| Herb/Spice | Ideal Pairing |
| Cinnamon | Apples, carrots, sweet potatoes |
| Mint | Peas, cucumber |
| Thyme | Chicken, squash |
Subtle use of seasoning enables smoother transitions to family meals and can foster a lifelong love for healthy eating. Remember, a pinch is enough, and avoid adding salt and sugar.
Proper Storage And Freezing
Transitioning to stage 2 baby food is a significant milestone for both babies and parents. It involves a delightful exploration of new textures and flavors as well as new challenges, namely the correct storage and freezing methods to ensure that your homemade delights are safe and nutritious for your little ones. Appropriate storage and freezing techniques are critical to maintaining both the quality and safety of the baby food you have lovingly prepared.
Choosing Appropriate Storage Containers
The first step in safe baby food storage is selecting the right containers. Ideal containers should be:
- BPA-free to prevent chemical contamination.
- Airtight to keep food fresh and prevent odors.
- Freezer-safe if you plan to freeze portions for later.
- Label-friendly so you can note the contents and date of preparation.
Silicone trays with lids and small glass jars are popular options. The portion size should match your baby’s typical meal to minimize waste and simplify thawing. It is essential to choose containers that support your baby’s growing appetite.
Refrigeration Guidelines
After pureeing your baby’s food, prompt refrigeration is necessary. Here are some key guidelines:
- Temperature: Ensure your refrigerator is at or below 40°F (4°C).
- Storing on Shelves: Place containers in the main section, not in the door, to maintain consistent temperature.
- Duration: Most homemade baby food can stay fresh in the fridge for up to 48 hours.
Remember, when in doubt, discard any food you suspect might be compromised to safeguard your baby’s health.
Freezing And Thawing Techniques
Freezing baby food not only extends its shelf life but also allows busy parents to prepare meals in batches. Apply these techniques for optimal results:
Portioning:
– Use ice cube trays or small containers to freeze individual-sized servings.
Labeling:
– Always label containers with the food type and date to track freshness and variety.
Freezing:
– Spread containers out in the freezer to allow quick freezing and to avoid lumping.
Thawing:
– Thaw servings overnight in the fridge or using a water bath. Avoid microwaving as it may cause hot spots.
Refreezing partially thawed food is not recommended as it can compromise the taste and nutrition and may pose a microbial risk. Properly managing the freeze-thaw cycle will ensure your baby enjoys the healthiest and tastiest meals possible.
Tips And Safety Precautions
Welcome to the section on ‘Tips and Safety Precautions’ for making stage 2 baby food. As your little one grows, their nutritional needs evolve, requiring more complex textures and varieties in their diet. However, before introducing these new culinary delights, it’s imperative to prioritize safety and health. Moving from purees to slightly chunkier foods shouldn’t be daunting. With the right knowledge, you can ensure the transition is not only delicious but also safe and enjoyable for your baby. Dive into the following guidelines designed to assist you in this wonderful journey of culinary exploration with your infant.
Maintaining Proper Hygiene
Good hygiene is the cornerstone of preparing stage 2 baby food. To avoid contamination and foodborne illnesses, follow these best practices:
- Wash your hands thoroughly with soap and water before preparing baby food.
- Clean all utensils, cutting boards, and countertops with hot soapy water before use.
- Rinse all fruits and vegetables under running water, even those with skin you plan to peel.
- Cook foods to the appropriate temperature to kill any potential bacteria.
- Refrigerate or freeze baby food in airtight containers immediately after cooking.
Avoiding Common Choking Hazards
Safety comes first as your baby starts to try foods with more texture. Protect your child with these tips:
- Avoid hard, round foods like whole grapes, nuts, and popcorn.
- Ensure foods are soft enough to be mashed with gentle pressure.
- Cut foods into small, pea-sized pieces that are manageable for your baby.
- Always supervise your baby during mealtime to quickly address any issues.
Signs Of Food Allergies Or Intolerance
Introducing new foods might come with the risk of allergies or intolerances. Stay vigilant for these signs and symptoms:
- Skin reactions such as hives or a rash, particularly around the mouth or elsewhere.
- Gastrointestinal discomfort like vomiting, diarrhea, or persistent crying after meals.
- Respiratory issues, including wheezing or difficulty breathing.
- Swelling of the face, lips, or tongue.
If any of these symptoms occur, stop feeding the suspect food immediately and consult your pediatrician.
Frequently Asked Questions For How To Make Stage 2 Baby Food
What Ingredients Are Best For Stage 2 Baby Food?
Choose a variety of fruits, vegetables, and proteins that are pureed to a thicker consistency than Stage 1 foods, ensuring they are age-appropriate and allergen-aware.
How To Introduce Textures In Stage 2 Baby Food?
Mix purees with soft, mashed foods to gradually expose your baby to new textures, while monitoring for any signs of gagging or difficulty swallowing.
Can Spices Be Added To Stage 2 Baby Food?
Yes, mild spices like cinnamon or nutmeg can be added to enhance flavor, but avoid salt and sugar to promote healthy eating habits from the start.
How Long Can Homemade Stage 2 Baby Food Be Stored?
Homemade Stage 2 baby food can be stored in the refrigerator for up to 48 hours, or frozen in airtight containers for up to 3 months.
What Is The Portion Size For Stage 2 Baby Food?
Typically, portion sizes for Stage 2 baby food range from 2 to 4 ounces, adjusted according to your baby’s hunger cues and nutritional needs.
Conclusion
Making stage 2 baby food at home is both rewarding and simple. It allows for nutritional customization to suit your little one’s needs and tastes. By following the steps outlined in this post, you’ll serve up delicious, wholesome meals that nurture growth.
Experiment with flavors, and enjoy the journey of watching your baby explore new foods. Happy pureeing!